Welcome to Camera Security Now!
Security Camera and Surveillance System Installation For All Markets, Nationwide
Government
Our IP security camera systems help federal, state, and municipal government agencies monitor their vital infrastructure as well as remote locations. From city parks, police interrogation rooms, libraries, etc, we offer government agencies the most cost effective and advanced IP surveillance systems available today.
Businesses
Video surveillance is the perfect tool for business owners and managers to better manage their business such as, gyms, gas stations, hotels, etc. Security cameras installed in your business can provide critical video resources to monitor employee and customer theft, false workers compensation claims, inventory control etc.
Schools
Security camera systems in schools are now critical to help protect the most valuable and cherished among us, our children. State of the art IP surveillance systems can be quickly deployed to protect educational facilities ranging from smaller day cares or elementary schools, to large high school and college campuses.
Featured Uniview Cameras
Uniview is the leading IP video surveillance manufacturer in the world with 16 years of unlimited exploration and experience, allowing the company to rise above all with their IP cameras, NVRs, Encoders, Decoders, Storage, and many more! Uniview's mission is to endeavor a safer world based on professionalism and reliability for their customers. If you are interested in getting a Uniview camera, please check out our featured camera selection below!

Tri-Guard Cameras
The Tri-Guard Security Camera is integrated with the Smart Intrusion Prevention, ColorHunter, and Active Deterrence, equipping it to provide instant feedback once there is movement, even in low-light conditions. This camera is featured with a High Quality image with 8MP, 1/2.8" CMOS sensor, IP67 Protection, Supports 9:16 Corridor, and more! If you are interested, please contact us today!
Tri-Guard Quote
Human Recognition PTZ
A high quality outdoor PTZ camera with features such as, Ultra 265/H.264/MJPEG, Auto Tracking by Human Body Detection, 4x optical zoom (2.8-12mm), 1/2.7" 5MP PS CMOS, 30fps@5MP (2880x1620), IR distance up to 164 feet, 0.003 lux, Micro SD up to 256GB, and many more! If you are interested please fill out the quote form down below!
PTZ Quote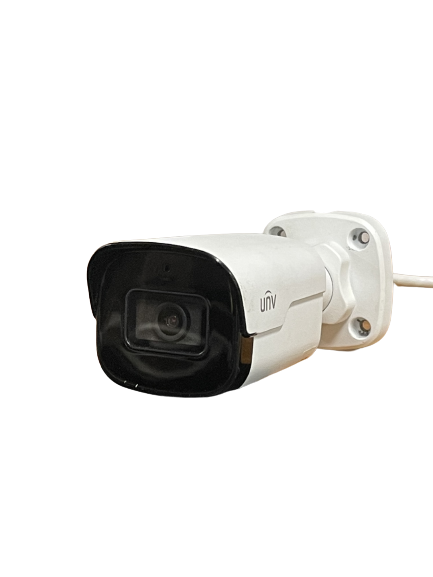
Bullet Cameras
With Starlight Illumination technology and up to 120dB WDR (Wide Dynamic Range), this bullet camera from Uniview offers optimal functionality, during the day or night. A prime choice for license plate recognition due to its 105 degree field of view, automatic zoom, and 330ft (100m) of IR vision. This camera records video at a resolution of 1920x1080p at 30fps and also supports Ultra 265, H.265, H.264, and MJPEG compression.
Turret Camera QuoteGet Started
We Make It Easy
Getting started on the path to your new CCTV camera system from Camera Security Now couldn't be easier!
Our experienced surveillance specialists take the hassle and fear out of shopping for the right surveillance system.
After a free phone consultation, our security camera specialists will either send you a detailed and itemized quote for the best and most cost effective solution for your situation or we will schedule a site visit (either virtual or physically onsite) with a qualified installer that will allow us to see and chat about your needs in real time at no cost to you.
Our security consultants are here to help make your task of obtaining a new security camera system easier so click below or call 800-440-1662 today to get started!
Not ready to call yet? Click here to learn more about how you can get a security camera install near you.
High Quality Systems
We specialize in state of the art equipment
As a reseller of this highly revered brand, Camera Security Now offers turnkey GeoVision surveillance systems and camera servers at affordable rates. GeoVision brings you the quality of product and Camera Security Now brings you the professionalism, experience and installation to assist you through the process of determining your exact needs and carrying out the solution from start to finish.
read moreVirtual Site Visits
Evaluating your security system needs remotely
We don't want you taking time out of your day to wait around for a surveillance specialist to do a site visit of your location. Instead all you need is a mobile webcam (most smartphones, laptops, or tablets have them built-in) capable of doing a live video chat with one of our specialists.
read moreLeaders
in customer service
Today's consumers know that promises are only as solid as the company that makes them. At CameraSecurityNow.com our promise of customer service comes with over 30 years of proven success. From your initial call where we take the time to understand your unique security needs, to proposing an effective solution, to promptly handling post sales warranty issues, to the reassurance that we will be here tomorrow, CameraSecurityNow.com offers a camera service and installation experience that's fast, friendly and reliable. We staff experienced and knowledgeable IT professionals who can address complex networking problems and provide the technical support your business needs.
Lifetime
Support for your system
Because we realize the vast diversity in both the needs and budget of our customer base, CameraSecurityNow.com offers a complete range of hardware warranty and support options. As a professional security camera installer, our security camera installation and equipment is backed up with a warranty and our premium technical and camera support.
Our Service Areas
Our corporate office is located in Middletown, Ohio between Dayton and Cincinnati. Camera Security
Now offers
a network of security camera experts across the United States and have performed installation and service in all
50
states.
All of our security camera installations are backed with the same customer satisfaction guarantee that we extend to
local
clients, regardless of your business location. With service representatives ready to answer any
question or handle any problem, we put the customer first, every time.
